v1
caution
Due to all innovations and changes introduced with Paywall 2.0 and Paywall 3.0, the Paywall 1.0 version is no longer applicable. Consequently, the contents of this guide will be deleted by 31.12.2020.
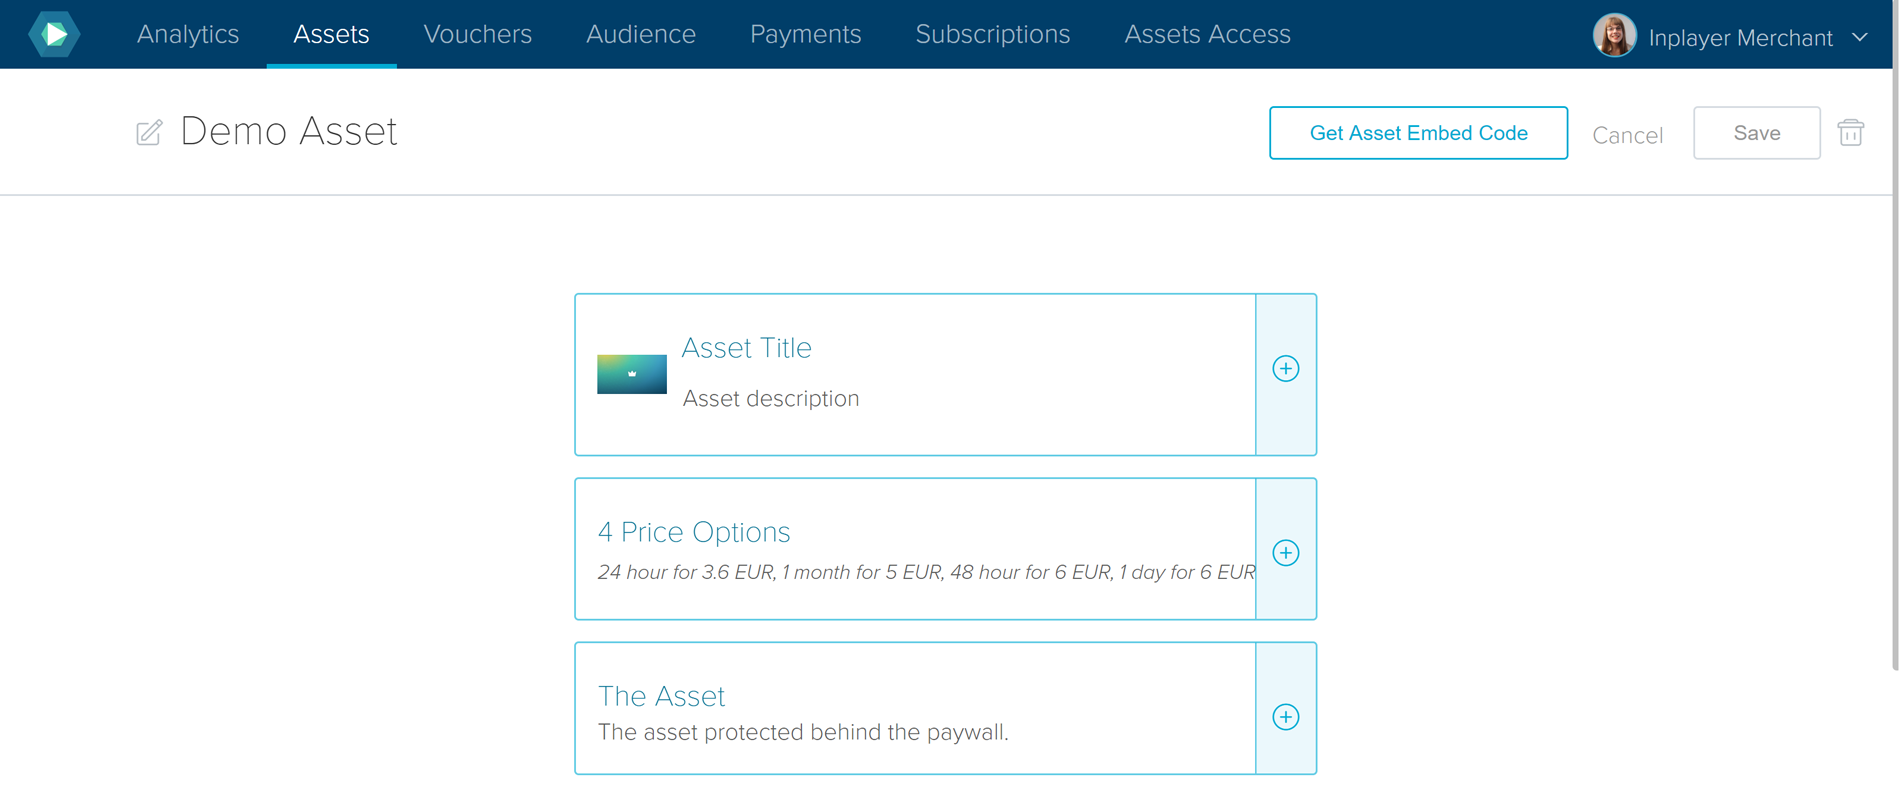
The InPlayer paywall application provides you a fast and easy way for selling your content online. For each digital asset you create in our platform, you are granted a corresponding embed code that will create the whole end-user experience once placed on a website. The paywall application is only the web-based solution, so for more complex integrations or cross-platform solutions refer to our REST API or JS SDK guides. You can easily find the embed code of any asset in the InPlayer Dashboard’s Assets Section, as shown in the screenshot below.

Standard Embed Code#
The paywall embed code includes two parts:
- the InPlayer paywall application scripts:
- the asset embed code where the video should be embedded:
The asset embed code consists of two parts as well: an HTML code and a JavaScript code.
The HTML code creates a DIV element having the asset ID passed in as the element ID in the following format: inplayer-ASSET_ID. In the previous example the asset ID is 42095.
The JavaScript code should invoke the inject method of our JavaScript app which will create the complete UI flow of a premium content. If there is no active account logged in the browser, the inject method will render a preview template of the embedded asset. There will be a purchase button that would invoke widget overlay functionality for registering/login account, a price selector, and a payment details page. After the visitor creates an account, completes the flow, and makes successful payment, the InPlayer application will replace the preview template with the premium asset.
The InPlayer inject method receives three parameters, although in the standard embed code there is no third parameter.
The first parameter is ASSET_ID, the same value from the DIV element ID of the html part of the embed code. The second parameter is MERCHANT_UUID, the unique identifier of the merchant account. The third, optional parameter OPTIONS can be an array of many additional options that are described in the following section.
Embed Code Options#
All embed code OPTIONS should be passed as an array within the last parameter of the embed code. In addition, let’s consider an example of an embed code containing all possible options:
There are two types of embed code options: optional settings and events. The optional settings enable you to add, remove or change certain functionalities of the paywall, wheareas with the optional events, you can have additional functionality that can be triggered after some action in the paywall.
Optional Settings#
| Setting | Type | Description |
|---|---|---|
| noPreview | Boolean | Hides the preview template, in case custom preview is needed. |
Optional Events#
The paywall application is capable of firing multiple events based on certain action. Therefore, you can use the paywall events to have additional custom functionalities that will be executed only after the event type. In the following section you can find listed all the supported event types along with examples on how to solve different scenarios with the paywall options.
Using Custom Preview#
The following example illustrates how using the noPreview option in the paywall removes the default preview template and allows creating a custom preview - say, a video trailer. Additionally, it shows how to create a call-to-action button that invokes the paywall experience.
Once our CSS and JS scripts are included in a website, the first part of the embed code is a DIV element for the place where the preview content is going to be created. After a successful payment, the paywall embeds the premium video, overwriting the custom preview content.
The next part of the embed code serves to create a call-to-action button which invokes the paywall for the desired premium asset. In this example, the action button is the html button element. However, this functionality can be added on any other element type. To do so, use a class in the following format: inplayer-paywall-ASSET_ID
In order for the button to disappear when the premium content is loaded, the button has to be placed inside the preview content DIV element. The user should not be able to click the purchase button for assets they have already purchased. The paywall overwrites everything inside the preview DIV element, so once a successful payment has been made, the button disappears.
The following is JavaScript code which adds the paywall functionalities to the html elements. It’s a standard inject code with the noPreview setting included.
Our paywall cannot know what the preview content of the video in question was, so location.reload in the onLogout event is used. After logging out, our paywall removes the premium video, but as the paywall does not know what used to be on the page before the video was injected, a page reload brings that preview up, after logging out.
Here is the full embed code for custom preview functionality: